
Choosing an outdoor LED display is not just a matter of selecting the brightest screen. Sunlight, rain, viewing distance, and maintenance access all affect how well it performs. A DIP LED display outdoor solution may suit installations that need strong visibility and robust construction, but the right choice depends on the site. A screen beside a busy road has different needs from one mounted above a shaded entrance.
Start by assessing the environment. Note the hours of direct sun, likely viewing distance, and available space for service access. Then compare pixel pitch, brightness, weather protection, cabinet design, and power requirements using verified product specifications. A tighter pixel pitch can improve close-up detail, while a more distant audience may not need it. Brightness matters outdoors, but higher output alone does not guarantee a readable image. Glare and viewing angle count, too.
Ask suppliers how the display handles water exposure, heat, and routine repairs. Check warranty terms and request references for similar installations. These details are less exciting than a vivid demo. They matter more over time. Still, no checklist can predict every site condition; measurements taken on location are essential. The choice is rarely neat. This guide explains the practical factors behind comparing outdoor DIP LED displays, so buyers can ask better questions and avoid relying on headline specifications alone.
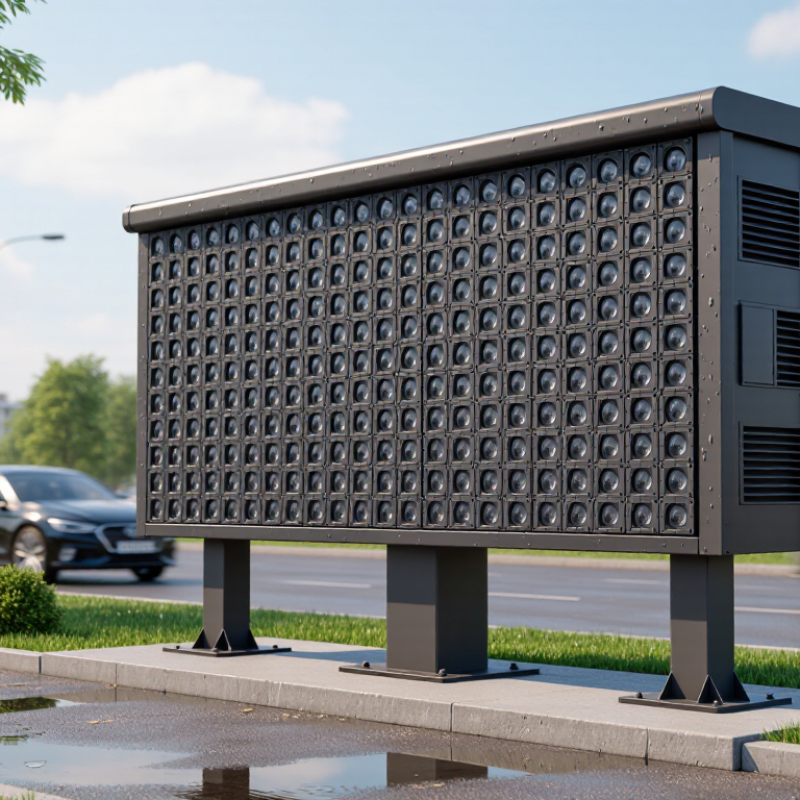
Outdoor DIP LED displays use through-hole LEDs mounted directly on a circuit board. DIP means dual in-line package. Each pixel usually combines separate red, green, and blue LED lamps. Their mixed light creates full-color images.
A receiving card sends digital data to display modules. Driver circuits control current through each color channel. The display refreshes rows rapidly, so the eye sees a stable picture. High brightness improves sunlight readability, while lenses shape viewing angles. A sealed cabinet protects electronics from rain, dust, and humidity. Still, weatherproof does not mean maintenance-free. Water can enter through damaged seals or poorly fitted cables.
When choosing one, measure viewing distance and ambient sunlight. A road-facing screen needs strong brightness and suitable pixel spacing. A smaller screen may need finer spacing for readable text. DIP modules often tolerate outdoor heat and impact well, but power use can be significant. Ask for measured brightness, refresh rate, protection rating, and operating temperature. I once treated brightness as the main specification. That was incomplete judgment. Excessive brightness can waste energy and create glare at night. Check for automatic dimming. Also inspect spare-module access, cable drainage, and controller compatibility before installation. A test image should remain readable from the audience area, not only from directly in front.
How to Choose an Outdoor DIP LED Display
Which Environmental Conditions the Display Must Withstand
An outdoor display faces more than rain. Direct sunlight heats the cabinet, while wind-driven dust can enter through seams and cable openings. Check the actual site: a screen beside a coastal road may encounter salt spray, and a west-facing wall can collect intense afternoon sun. The WMO’s State of the Global Climate 2023 report estimated global mean temperature at 1.45 ± 0.12°C above the 1850–1900 average. That figure is not a local design temperature, but it reinforces the need to assess heat exposure rather than rely on yesterday’s conditions. Small detail, big consequence.
Ask for documented operating and storage temperature ranges, humidity limits, and ingress-protection test results. IEC 60529 defines IP ratings; an IP65 enclosure is dust-tight and protected against water jets, but that does not make every connector or installation point equally protected. Inspect the full assembly. Drainage, sealed cable glands, and unobstructed ventilation matter in the field. Also consider freeze-thaw cycles, standing water, and prolonged UV exposure, which can age plastics and seals. A specification sheet can look reassuring. It may still leave gaps. Have the supplier identify test conditions and verify them against local weather records and the exact mounting location.
Plan for the site, not just the screen. This illustrative operating range of −20°C to +60°C is a common outdoor-display specification, not a universal guarantee. Check the chosen display’s datasheet, and assess humidity, direct sunlight, wind loading, and dust and water ingress. An IP65 enclosure is dust-tight and protected against water jets; installation and maintenance still affect real-world protection.
How to Choose an Outdoor DIP LED Display
How to Compare Brightness, Pixel Pitch, and Viewing Distance
Start with the actual viewing conditions, not the largest brightness number on a specification sheet. A screen facing afternoon sun needs more output than one beneath a shaded canopy. Ask for brightness measured in nits, and check whether the figure describes sustained operation rather than a brief peak. Too little brightness makes images look washed out. Too much can cause glare at night, so scheduled dimming is useful. Check the viewing angle too; people may approach from the side, not just straight on.
Pixel pitch describes the distance between neighboring pixels, usually in millimeters. A smaller pitch can show finer text and detail, but it often increases cost and may not improve the image for people standing far away. Estimate the closest regular viewing distance, then compare sample images from that position. A display beside a pedestrian path needs different detail than one viewed across a road. Measure the site if possible. Guessing is easy, and sometimes wrong.
Treat brightness, pitch, and distance as a set. A high-resolution panel cannot fix poor placement, while a bright panel cannot make tiny text readable from far away. Check content at the expected distance, including simple lettering and high-contrast images. Also ask how brightness changes with ambient light and whether service access is practical outdoors. One detail is easy to overlook: viewing distance can change when people stop, queue, or move closer. That can shift the right choice.
| Pixel Pitch | Typical Pixel Density | Typical Outdoor Brightness | Practical Viewing Distance | Common Applications | Key Trade-Off |
|---|---|---|---|---|---|
| 10 mm | 10,000 pixels/m² | About 6,000–8,000 nits | Approximately 10 m and beyond | Roadside signs, large-format advertising, and venues viewed from relatively close distances | Higher pixel density can provide more detail, but usually increases display cost and power demand compared with coarser pitches. |
| 16 mm | About 3,906 pixels/m² | About 6,000–8,000 nits | Approximately 16 m and beyond | Building façades, outdoor billboards, and event screens | A practical balance for content viewed from medium-to-long distances; fine text may be less legible up close. |
| 20 mm | 2,500 pixels/m² | About 6,000–8,000 nits | Approximately 20 m and beyond | Large roadside displays and stadium or arena screens | Suitable for large images and bold text at a distance; smaller details appear less defined. |
| 25 mm | 1,600 pixels/m² | About 6,000–8,000 nits | Approximately 25 m and beyond | Very large façades, long-distance advertising, and large venue displays | Coarser pitch can suit large viewing distances, but is generally unsuitable when viewers stand close to the screen. |
Selection note: Viewing distances are practical estimates, not fixed limits; content, eyesight, and ambient conditions affect perceived image quality. A common starting point is about 1 m of viewing distance per 1 mm of pixel pitch. Actual brightness requirements depend on direct sunlight, screen orientation, and local conditions. Choose a display with adjustable brightness and verify the manufacturer's measured specifications before purchase.
Start with the site, not the product sheet. Measure the distance from the screen to the farthest regular viewer, then consider how close people may stand. A roadside display viewed from 30 meters can use a different pixel pitch from a screen beside a pedestrian entrance. Smaller pitch can improve close-up clarity, but it often raises cost and maintenance demands. Measure twice.
For direct sunlight, compare brightness ratings and check whether the display includes automatic brightness control. A rating around 5,000 nits may suit many sunny locations, but shade, orientation, and local conditions matter. Ask for test data, not just a headline figure. Outdoor cabinets also need suitable weather protection. Look for an IP rating that matches exposure to rain and dust, and confirm how the rear of the installation will be protected.
Match cabinet size and weight to the mounting structure, and have a qualified installer check wind loading and support points. Confirm available power, cable routes, and access for servicing before fixing the screen dimensions. A high refresh rate can help reduce flicker in camera footage, though the right setting depends on the cameras and content. I would not choose from specifications alone; real viewing conditions can expose compromises that a clean datasheet misses.
It should handle rain, direct sunlight, wind-driven dust, humidity, and temperature changes. Coastal sites may also face salt spray. Small exposure differences matter.
Not necessarily. It protects the enclosure against dust and water jets. Connectors, cable openings, and mounting points need separate inspection.
Request operating temperatures, storage temperatures, humidity limits, and ingress-test conditions. Compare them with local weather records and the exact mounting location.
Consider sunlight direction, shade, viewing distance, and nighttime glare. Ask whether the brightness figure supports sustained operation, not only a short peak.
Not always. Brightness cannot make tiny text readable at a long distance. Content size and pixel pitch must match real viewing conditions.
Smaller pitch can show finer text and detail. However, it may add cost without visible benefits for distant viewers. Test sample images onsite.
Look for rigid construction, flat panels, drainage paths, sealed cable glands, and practical ventilation. Trapped heat can shorten component life. A neat cabinet can still hide weaknesses.
Check front or rear access, replaceable modules, labeled wiring, spare connectors, and independent power zones. Keep a fault log. I once underestimated night brightness needs, then corrected it after installation.
Choosing the right outdoor DIP LED display starts with understanding how its direct-in-line LED modules create bright, visible images for outdoor use. Consider the conditions the screen will face, including sunlight, rain, wind, dust, temperature changes, and humidity. These factors influence the protection level and construction needed for dependable operation. Compare brightness with the amount of ambient light at the site, and select a pixel pitch that suits both the expected viewing distance and the level of detail viewers need.
Next, assess cabinet design, power consumption, and maintenance access. A practical cabinet should fit the installation structure, support effective heat management, and allow service work to be carried out efficiently. Match the display’s specifications to its location, dimensions, audience, viewing angles, and operating schedule. By balancing environmental durability, image clarity, energy use, and upkeep, you can choose a DIP LED display outdoor solution that meets the installation’s actual requirements without paying for features it does not need.
